The reliable way to clean fiber optic connectors is the inspect–clean–inspect method. Inspect the end face first, clean only when contamination is found, then re-inspect before mating. Match the tool to the connector: a lint-free wipe for exposed patch cords, a one-click cleaner for adapters and ports, a swab for recessed interfaces, and a dedicated MPO/MTP cleaner for multi-fiber ferrules. Wet-to-dry is the most forgiving technique for stubborn film, but only with a small amount of fiber-grade fluid that finishes on a dry zone.
Fiber optic connector cleaning is one of the cheapest insurance policies in an optical network. A connector end face can look spotless to the naked eye and still carry oil, lint, salt residue, or sub-micron debris on the ferrule. Because a single-mode core is only about 9 µm across, a particle far too small to see can sit between two mated fibers and cause insertion loss, return loss, link instability, or a failed certification test. This is not a fringe problem: in a widely cited study by NTT Advanced Technology, contamination of connector end faces was reported as the single biggest cause of network failures, with the large majority of installers and network owners pointing to it as the root cause.
This guide explains how to clean fiber optic connectors correctly, which cleaning tool to use for each connector type, when wet-to-dry cleaning beats dry cleaning, and which mistakes quietly wreck links in data centers, FTTH builds, and test-and-certification work. Where it matters, it points to the recognized industry standard rather than to opinion.

Why Fiber Optic Connector Cleaning Matters
Fiber connectors exist to align two cores with micron precision. When two end faces are mated, even a small particle can wedge between them, block part of the optical path, create an air gap, raise insertion loss, and scatter light back toward the source as return loss. On high-power systems and high-data-rate links with tight loss budgets, there is very little margin to give away.
Contamination arrives from more places than most people expect:
- Dust caps and end caps, which protect against large debris but can shed plastic residue or trap fine particles
- Fingerprints and skin oil, which are difficult to remove once transferred
- Packaging material, lint, and airborne dust
- Dirty adapters and alignment sleeves
- Transceiver ports and the bulkheads they sit behind
- Test reference cords, power-meter adapters, and inspection-probe tips
- Re-used wipes or swabs that are already loaded with debris
- A previously contaminated connector touching a clean one
A common and costly assumption is that a brand-new connector is automatically clean. Factory-terminated assemblies, new patch cords, transceiver ports, and test cords should all be inspected before first mating. The dust cap is a shipping cover, not a guarantee of cleanliness.
Cross-contamination is what makes a dirty connector dangerous beyond itself. The moment a contaminated end face mates with a clean one, debris transfers in both directions and the problem spreads down the link, becoming far harder to isolate. That is exactly why cleaning belongs in the normal connection workflow, not in the emergency troubleshooting bin.
Field note: in a high-density LC patch panel, one contaminated test cord is all it takes to seed debris across a row of ports as a technician moves down the rack. The "fault" then looks random and intermittent, when the real cause was a single dirty reference jumper inserted an hour earlier.
The Core Method: Inspect, Clean, Inspect
The safest workflow for fiber optic connector cleaning is short and deliberate:
- Inspect the connector end face.
- Clean only if contamination is present.
- Re-inspect to confirm the end face is clean.
- Mate only after it passes inspection.
- Cover any connector you are not mating with a clean dust cap.
This is not a house rule. It mirrors the inspect-clean-inspect sequence described in the international standard for end-face inspection, IEC 61300-3-35, which sets out how to examine a ferrule for scratches, pits, and debris across defined zones and decide whether it is fit to mate. The 2022 edition refined the pass/fail zones so that contamination in the outer adhesive and contact regions no longer automatically fails an end face, since debris there generally does not block the light path. Inspection with a fiber microscope or digital probe is the recommended way to make that call objectively rather than by eye.
Inspect-clean-inspect matters because cleaning is not free of risk. Cleaning a connector that is already clean can generate static, deposit lint, or push particles into the contact zone. Mating a connector that is dirty can scratch the ferrule and spread contamination. Inspecting on both sides of the decision keeps you from creating the very problem you are trying to prevent. For professional installation and certification, automated pass/fail inspection against the standard's criteria removes the subjectivity of "how clean is clean enough" and keeps results consistent across different technicians. A handheld fiber end-face inspection probe is the practical tool for this step in the field.

Dry vs Wet vs Wet-to-Dry Cleaning
Three cleaning approaches are common in the field, and they do not deliver the same result.
| Method | How it works | Best for | Main risk |
|---|---|---|---|
| Dry cleaning | Dry wipe, cassette/reel cleaner, or one-click cleaner with no fluid | Light, loose dust on accessible end faces | Can build static and may not lift oils or fingerprints |
| Wet cleaning | Fiber-grade fluid applied to a wipe or swab | Oils, salt residue, and stubborn film | Too much fluid spreads contamination or leaves streaks |
| Wet-to-dry cleaning | Start on a lightly dampened zone, finish on a dry zone in one motion | Most reliable general-purpose field cleaning | Needs the right fluid amount and correct technique |
Wet-to-dry is often preferred because it combines the strengths of both: the fluid loosens oils, residue, and statically charged particles, and the dry zone removes the remaining fluid and debris so nothing is left to dry into a film. The discipline is to use only a small amount of an approved, fiber-optic-grade cleaning fluid. Flooding the connector pushes contamination into the adapter, sleeve, or connector body, and pure alcohol left to evaporate on its own tends to leave wiping streaks. The goal is a barely damp surface, not a soaked one.
When is dry cleaning enough? For light, loose dust on an accessible end face that passes inspection afterward, dry cleaning is fine and avoids introducing fluid. When do you need wet-to-dry? When dry cleaning fails to remove oily or filmy contamination, or when fingerprints are involved. When should you stop cleaning and replace instead? If contamination remains after repeated cleaning, re-inspect for scratches or pits rather than scrubbing harder; permanent damage will not clean off, and a scratched ferrule in the core zone should be replaced rather than mated.
Step-by-Step: How to Clean a Fiber Optic Connector
The exact tool changes with the connector type and access point, but the workflow stays the same.
Step 1: Prepare the work area and tools
Lay out an inspection scope or digital probe, optical-grade lint-free wipes, fiber-grade cleaning fluid, a one-click or cassette cleaner, connector-specific swabs, clean dust caps, and a waste container for used consumables. Keep paper tissue, cotton buds, clothing, general-purpose wipes, and compressed air well away from the end face; they shed lint or leave propellant residue. A purpose-built fiber optic cleaning and tool kit keeps the right consumables together so a technician is not improvising on site.
Step 2: Inspect the end face first
Inspect before any tool touches the ferrule. Look for dust, oil, residue, scratches, and pits around the core and cladding. For adapters, transceiver ports, and bulkhead connections, inspect both sides where possible. Cleaning one side does nothing if the mating connector or the adapter sleeve is the dirty one.
Step 3: Apply a small amount of approved cleaning fluid
Apply fiber-grade fluid to a wipe, cleaning platform, or tool tip. Do not spray fluid directly into an adapter or onto the end face unless the product instructions explicitly allow it. For wet-to-dry, dampen only part of the surface and leave the rest dry, so the connector can travel from wet zone to dry zone in a single pass.

Step 4: Wipe from the wet zone to the dry zone
Hold the connector straight and move the end face across the surface in one direction, starting damp and finishing dry. Do not scrub back and forth over the same spot. For APC connectors, keep the angled end-face geometry in mind: do not twist, press hard, or use a figure-eight motion. Excess pressure or the wrong angle damages the end face.
Step 5: Re-inspect before mating
Inspect again. If contamination remains, repeat with a fresh area of the wipe or a new tool. Never re-use the same wipe zone, swab, or cleaning tip; a used surface is already contaminated and will transfer debris straight back. Per Section 5.3 of the inspection standard, this re-inspection step is what prevents cross-contamination of the mating ferrule and the scratches it causes.
Step 6: Protect the cleaned connector
Mate it promptly or cap it with a clean dust cap. Do not set a cleaned connector on a bench, cable tray, rack shelf, or clothing. If a dust cap has been dropped, pocketed loose, or exposed to dirt, replace it rather than reusing it.
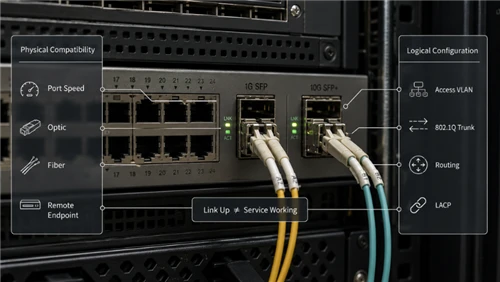
Choosing the Right Fiber Optic Cleaning Tool
The best tool depends on the connector type, whether the end face is exposed or recessed, and how much room the technician has to work. The table below maps connectors to tools and typical locations.
| Connector / interface | Recommended tool | Where you use it |
|---|---|---|
| LC, MU (small ferrule) | 1.25 mm one-click cleaner; lint-free wipe for exposed ends | High-density panels, data center patching |
| SC, FC, ST (2.5 mm ferrule) | 2.5 mm one-click cleaner; wipe for exposed patch-cord ends | Patch panels, FTTH, telecom racks |
| MPO / MTP (multi-fiber) | Dedicated MPO/MTP cleaner and MPO inspection scope | Backbone, parallel optics, trunk links |
| Transceiver port | Connector-matched swab or port cleaner; inspect after | Switches, line cards, optics cages |
| Test / reference equipment port | Swab or one-click cleaner sized to the bulkhead | Power meters, OTDRs, reference cords |

Lint-free wipes for exposed patch-cord end faces
Optical-grade lint-free wipes suit exposed male end faces such as patch-cord tips, where you can hold the connector and draw it across the wipe in a controlled motion. Use them for LC, SC, FC and ST patch cords, test cords, and exposed ferrules. Avoid household tissue and paper towel, which shed fibers onto the ferrule.
One-click cleaners for adapters and ports
One-click cleaners are quick for bulkhead adapters, patch panels, and high-density racks, advancing a fresh ribbon with each click. They are ideal for field service and for data center moves, adds, and changes. They are not a substitute for inspection: still inspect before and after.
Cleaning swabs for recessed ports and sleeves
Swabs reach end faces that a wipe cannot, including alignment sleeves, backplane connectors, and some transceiver ports. Match the swab size to the connector: too large and it cannot seat correctly, too small and it misses part of the surface. A dedicated LC connector cleaning swab is sized for the 1.25 mm interface so it actually contacts the ferrule.
MPO/MTP cleaners for multi-fiber connectors
MPO and MTP connectors carry many fibers in one rectangular ferrule, so a particle on one area can migrate across the array and affect several channels at once. Use MPO-specific cleaners and inspection tools for backbone links, parallel optics, and high-speed 40G/100G/400G/800G channels. Inspect the whole ferrule surface, then check individual fiber positions as your process requires. Never use a single-fiber tool on an MPO interface. If you are building or terminating these links, our MTP/MPO cable assemblies are factory-inspected to the same end-face criteria.
Cleaning Different Connector Types
LC and MU connectors
LC and MU use smaller ferrules than SC, FC, or ST. Use a cleaner or swab sized for the ferrule and never force a larger tool into a small adapter. Because LC dominates data centers and high-density panels, one-click cleaners and inspection probes earn their keep here.
SC, FC, and ST connectors
These larger connectors are easier to handle for wipe-based cleaning. For exposed patch-cord ends, wet-to-dry on an optical-grade wipe works well; for adapter ports, use the matching one-click cleaner or swab. You can review the full range of fiber optic connector types if you need to confirm ferrule size before choosing a tool.
MPO/MTP connectors
MPO/MTP needs a dedicated cleaning and inspection process. Because the ferrule supports multiple fibers, cleaning pressure, tool alignment, and full-ferrule inspection matter more than with single-fiber connectors. Distinguish pinned (male) from unpinned (female) ferrules when handling and inspecting, and keep single-fiber tools away from the interface.
Transceiver and test-equipment ports
Transceiver ports, power-meter adapters, probe tips, and reference cords are all contamination sources. Insert a clean test cord into a dirty port and the cord is contaminated instantly, then spreads debris to every link it touches afterward. Inspect and clean these interfaces regularly, especially when chasing unexplained loss or inconsistent readings. Before swapping optics, it is worth confirming the port and the matching fiber optic transceiver are both clean, and that the adapter sleeve between them is not the hidden culprit.
Common Fiber Connector Cleaning Mistakes
- Cleaning without inspecting. Blind cleaning wastes time and can add contamination. Inspect first, clean only when needed, inspect again.
- Using too much fluid. Excess fluid carries dissolved contamination into the connector body or sleeve. Use a little and finish dry.
- Re-using wipes or swabs. A used surface is already dirty and transfers particles back to the ferrule.
- Touching the end face. Skin oil is hard to remove and degrades the signal.
- Relying on compressed air as the main method. Air moves particles around rather than removing them, and some sprays leave residue or propellant.
- Trusting dust caps to be clean. Caps protect; they do not clean. A dirty cap contaminates a clean connector.
- Mating a dirty connector to a clean one. This contaminates both end faces and risks permanent scratching.
Field Checklist Before Mating
- Inspect both connector end faces.
- Clean only if contamination is present.
- Use the right cleaner for the connector type and ferrule size.
- Use only optical-grade lint-free materials.
- Apply a small amount of approved fiber-grade fluid.
- Move from wet zone to dry zone in one direction.
- Never re-use a wipe area, swab, or cleaning tip.
- Re-inspect after cleaning.
- Inspect adapters, ports, and test equipment too.
- Mate only after the connector passes inspection.
- Cap unused connectors with clean dust caps.
FAQ
Q: Should fiber optic connectors be cleaned every time?
A: They should be inspected every time before mating. If inspection finds contamination, clean and re-inspect. If the end face is already clean and passes, unnecessary cleaning can do more harm than good by adding static or lint.
Q: What is the best way to clean a fiber optic connector?
A: For most field work, wet-to-dry is the most reliable method: a small amount of fiber-grade fluid loosens contamination and a dry zone removes the residue. Match the tool to the connector and always inspect afterward.
Q: Can I use isopropyl alcohol (IPA) to clean fiber connectors?
A: IPA has been used widely, but it is not ideal for end-face cleaning. Depending on purity, packaging, and handling, it can dry slowly, attract moisture, or leave wiping streaks. A fluid engineered for fiber optics is usually the safer choice, and dry-then-wet cleaners designed for the job avoid the streaking problem.
Q: Can I clean a fiber connector with compressed air?
A: Not as the main method. Air tends to blow particles into a new location rather than remove them, and it will not lift oil, film, or statically held dust. Some canned sprays also leave residue or propellant on the end face.
Q: Why do I need to inspect after cleaning?
A: Cleaning does not guarantee every particle is gone. Re-inspection confirms the connector is ready to mate and prevents cross-contamination of the mating ferrule, which is the most common way scratches start.
Q: What should I do if a connector still fails inspection after cleaning?
A: Stop scrubbing. Re-inspect for scratches and pits rather than repeating the same motion. If the contamination is actually permanent damage in the core or cladding zone, clean it again to confirm, then replace the connector if it still fails. Cleaning fixes contamination, not physical damage.
Q: What tool should I use for LC connector cleaning?
A: Use a 1.25 mm one-click cleaner for LC adapters and ports, or a lint-free wipe for exposed LC patch-cord ends. Confirm the cleaner size matches the connector before you start.
Q: How do I clean MPO connectors?
A: Use an MPO/MTP-specific cleaner and inspection process. Inspect the entire ferrule surface and the individual fiber positions, distinguish pinned from unpinned ferrules, and never use single-fiber cleaners on an MPO interface.
Q: Can dirty connectors damage transceivers or fail certification?
A: Yes. Contamination raises insertion loss and return loss, destabilizes links, and can fail certification testing. Debris in the contact zone also causes scratches that may permanently degrade both the connector and the mated transceiver port.
Summary
Fiber optic connector cleaning is not housekeeping; it is part of building and protecting a reliable optical network. The method that holds up in the field is simple and repeatable: inspect every connector before mating, clean only when contamination is present, match the tool to the connector type, finish wet-to-dry on a dry zone when fluid is needed, and re-inspect before the final connection. Distinguish contamination from permanent damage so you know when to clean again and when to replace. For field teams, data centers, FTTH installers, and maintenance crews, a well-organized cleaning kit and a disciplined inspect-clean-inspect habit prevents far more link problems than it costs, and aligns with the recognized end-face criteria the rest of the industry tests against.